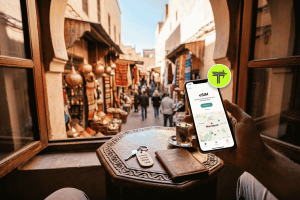
Your home carrier’s roaming charges are astronomical, and the thought of hunting down a physical SIM card kiosk, fumbling with tiny plastic cards and paperclips, feels like a chore you didn’t sign up for. This familiar travel headache is precisely why the world is shifting to a simpler, smarter solution: the e SIM.
If you’ve heard the term but aren’t quite sure what it means or how it works, you’re in the right place. An e SIM, or embedded SIM, is a digital version of the traditional physical SIM card. It’s built directly into your device, allowing you to activate a cellular plan without needing to insert a physical card. For travelers, students, and digital nomads, it’s a game-changer.
This guide will walk you through everything a first-time user needs to know. We’ll cover what an e SIM is, how it benefits you, how to check if your phone is compatible, and the simple steps to get connected.
What Exactly Is an e SIM?
Think of an e SIM as a rewritable SIM card that’s already inside your phone. Instead of a physical chip you swap out, it’s a small, embedded component on your device’s motherboard. You can download and install “e SIM profiles” from different carriers, which are essentially the digital equivalent of a physical SIM card.
This means you can have multiple cellular plans on a single device. For example, you can keep your primary number for calls and texts while using a secondary e SIM plan for affordable data when you travel abroad. There’s no more fumbling with tiny trays or worrying about losing your home SIM card while you’re on the move.
The Key Difference: e SIM vs. Physical SIM
The core function of both is the same: they securely connect your device to a mobile network. The difference lies in the format and convenience.
- Physical SIM: A removable plastic card that must be manually inserted into a device. It’s tied to one specific carrier, and changing providers means getting a new card.
- e SIM: A digital, embedded chip that can store multiple carrier profiles. You can switch between them through your phone’s settings, and new plans can be downloaded and activated instantly.
Imagine your phone’s storage. A physical SIM is like an old-school memory card you have to physically swap. An e SIM is like cloud storage—you can download, delete, and switch between files (carrier plans) digitally and remotely.
The Top Benefits of Using an e SIM for Travel
For anyone who frequently crosses borders, the advantages of using an e SIM are undeniable. It simplifies connectivity, saves money, and adds a layer of security to your travels.
1. Instant Connectivity Upon Arrival
The moment your plane touches down, you can switch on your e SIM data plan. There’s no need to connect to unreliable airport Wi-Fi or waste time searching for a local SIM card vendor. You can book a taxi, navigate to your accommodation, or message your contacts immediately.
2. Significant Cost Savings
International roaming charges from your home provider can be incredibly expensive. A single day of roaming can sometimes cost more than a week’s worth of local data. An e SIM allows you to purchase affordable, country-specific or regional data plans, giving you local rates without the commitment.
For instance, instead of paying $10 per day for your home carrier’s travel pass, you could buy an e SIM for Europe that gives you 10GB of data for 30 days for just $25. The savings add up quickly, especially on longer trips.
3. Keep Your Primary Number Active
One of the biggest concerns with swapping physical SIMs is losing access to your primary phone number. This is crucial for receiving two-factor authentication (2FA) codes from your bank, staying in touch via apps like WhatsApp, or receiving important calls. With an e SIM, you can use the e SIM for data while keeping your primary line active for calls and SMS. Most modern smartphones allow you to designate which line is used for data and which is for voice/text.
4. Enhanced Security and Convenience
Physical SIM cards can be lost, stolen, or damaged. Since an e SIM is embedded in your device, you eliminate that risk. It also adds a layer of security—if your phone is stolen, thieves can’t simply remove the SIM card to disconnect it from the network, making it easier to track. Furthermore, you avoid the potential scams associated with informal SIM card sellers at airports.
5. Multi-Country and Regional Plans
Many e SIM providers offer regional or global plans. Planning a multi-country trip through Southeast Asia or Europe? Instead of buying a new SIM card in every country, you can purchase a single regional e SIM that covers your entire itinerary. This seamless connectivity saves you time, money, and stress.
Getting Started With an e SIM: A Step-by-Step Guide
Ready to make the switch? The process is surprisingly simple. It boils down to three main steps: checking compatibility, purchasing a plan, and activating it on your device.
Step 1: Is Your Phone e SIM Compatible?
Before you purchase a plan, you need to ensure your device supports e SIM technology. Most flagship smartphones manufactured since 2018 have this capability.
How to Check on an iPhone:
- Go to Settings.
- Tap Cellular (or Mobile Data).
- Look for an option like Add e SIM or Add Cellular Plan. If you see this, your iPhone is compatible.
How to Check on an Android (Samsung, Google Pixel, etc.):
The steps can vary slightly by manufacturer, but the general process is similar.
- Go to Settings.
- Tap Connections (or Network & Internet).
- Select SIM Card Manager.
- Look for an Add e SIM option. If it’s there, your device is ready.
You can also quickly dial *#06# on your phone. If you see an “EID” (Embedded Identity Document) number in the device information that pops up, your phone has an e SIM.
Step 2: Choosing and Purchasing Your e SIM Plan
Once you’ve confirmed compatibility, it’s time to choose a plan. This is where providers like Terminal come in. You can browse plans based on your destination, the amount of data you need, and the duration of your trip.
- Visit an e SIM Provider’s Website: Go to the provider’s marketplace.
- Select Your Destination: Choose the country or region you are traveling to.
- Pick a Plan: Compare the available plans. Consider:
- Data Amount: How much data will you need? (e.g., 1GB, 5GB, 20GB)
- Validity Period: How long does the plan last? (e.g., 7 days, 15 days, 30 days)
- Coverage: Is it a single-country or regional plan?
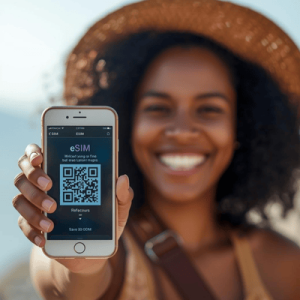
- Complete the Purchase: Add the plan to your cart and check out. You will typically receive a confirmation email containing a QR code and manual installation details.
Browse Terminal e SIM plans for over 100 countries
Step 3: Installing and Activating Your e SIM
This is the final step, and it’s much easier than it sounds. You’ll use the QR code from your purchase email. Make sure you have a stable internet connection (Wi-Fi or your existing cellular data) to complete the installation.
Installation on iPhone:
- Go to Settings > Cellular.
- Tap Add e SIM.
- Select Use QR Code.
- Scan the QR code from your provider with your phone’s camera.
- Follow the on-screen prompts. You’ll be asked to label your new plan (e.g., “Travel Data” or “Europe e SIM”). You can also choose its role—for example, setting it as your primary source for cellular data while keeping your home plan for voice and text.
Installation on Android:
- Go to Settings > Connections > SIM Card Manager.
- Tap Add e SIM.
- Select Scan QR code from service provider.
- Scan the QR code.
- Follow the prompts to add the plan. Like on an iPhone, you can manage your preferences for calls, messages, and mobile data.
Important Tip: Wait until you arrive at your destination before you turn on and start using your new e SIM plan to ensure the validity period doesn’t start prematurely. You can install it at home before you leave, but keep it turned off in your phone’s settings until you land.
Your e SIM Questions Answered
Here’s a quick-reference table to answer some of the most common questions first-time users have.
| Question | Answer |
| Can I use my e SIM and physical SIM at the same time? | Yes, this is called Dual SIM functionality. You can have both active simultaneously and choose which one to use for data and which for calls/texts. |
| Does an e SIM give me a new phone number? | Most travel e SIMs are data-only and do not come with a phone number. This is ideal for using apps like WhatsApp, Google Maps, and FaceTime. You keep your primary number for traditional calls and SMS. |
| Can I top up my e SIM plan? | This depends on the provider and the specific plan. Some plans can be topped up with more data, while others require you to purchase a new plan once the data is exhausted. |
| What happens if I delete my e SIM? | If you delete an e SIM profile from your device, you will need to reinstall it. Most e SIMs from travel providers are one-time installations and cannot be re-downloaded, so be careful not to delete them accidentally. |
| Can I transfer my e SIM to a new phone? | Generally, travel e SIMs are tied to the device they are installed on and cannot be transferred. For your main cellular plan, some carriers offer a process to transfer an e SIM to a new device. |
| Do I need an internet connection to activate my e SIM? | Yes, you need a stable Wi-Fi or cellular connection to download and install the e SIM profile via the QR code. It’s best to do this before you leave for your trip or upon arrival using airport/hotel Wi-Fi. |
Embrace Smarter, Simpler Travel
The world of travel is evolving, and so is the technology that keeps us connected. An e SIM eliminates one of the most persistent annoyances of international travel: finding reliable and affordable mobile data. It empowers you to step off the plane with confidence, knowing you have instant access to the digital world without the fear of a massive phone bill waiting for you back home.
By following the simple steps of checking compatibility, choosing a plan, and scanning a QR code, you can unlock a new level of freedom and convenience on your next adventure. Say goodbye to plastic SIMs and hello to seamless global connectivity.
Ready to try it for yourself? Your journey into hassle-free travel starts now.