But let’s be honest: nobody wants to waste their first hour in Australia hunting for a kiosk or fumbling with a paperclip to swap tiny plastic SIM cards.
The modern traveler’s secret weapon is the eSIM Australia solution. An eSIM (embedded SIM) allows you to download a data plan directly onto your phone without needing a physical card. It’s faster, more secure, and—best of all—can be set up before you even leave your living room.
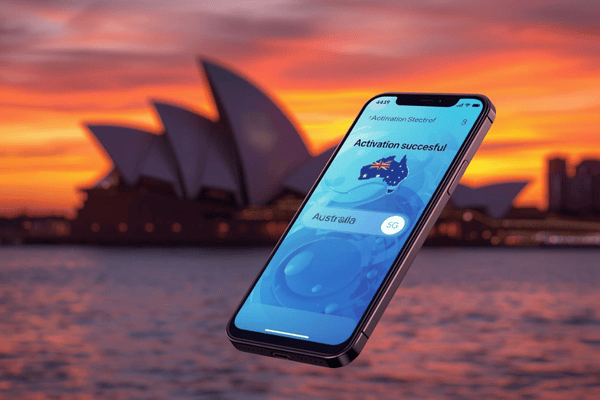
In this guide, we’ll show you exactly how to get your Terminal eSIM up and running in under five minutes, ensuring you have high-speed data the moment your plane touches the tarmac.
What is an eSIM and Why is it Perfect for Australia?
For decades, the “SIM card swap” was a mandatory travel ritual. You’d land, find a mobile booth, wait in line, show your passport, and hope you didn’t lose your home SIM card in the process. Digital technology has finally replaced this clunky method with the eSIM.
The Evolution of the SIM
An eSIM is a small chip built directly into your smartphone’s hardware. Instead of physically replacing the chip to change carriers, you simply “reprogram” it by downloading a digital profile. This technology has been standard in iPhones since the XS model and in most flagship Android devices like the Google Pixel and Samsung Galaxy series for several years.
Why Travelers Choose eSIM for Australia
Australia is a massive country with varying levels of infrastructure. When you use an eSIM Australia plan, you gain several immediate advantages:
- Instant Connectivity: You don’t have to wait for a store to open. You can activate your plan at 3:00 AM if that’s when your flight lands.
- Keep Your Home Number: Since the eSIM occupies a digital slot, you can keep your original physical SIM card in your phone. This allows you to receive important 2FA (two-factor authentication) texts from your bank or messages from home while using cheap local data for browsing.
- Enhanced Security: A physical SIM can be stolen or swapped. An eSIM is locked to your device, making it much harder for scammers to hijack your number.
- Environmental Impact: By choosing a digital solution, you’re helping reduce the millions of tons of plastic waste generated by disposable SIM cards and their packaging every year.
By partnering with top-tier Australian networks like Optus and Telstra, Terminal eSIM ensures that you get the same premium coverage as locals without the premium price tag.


Practical Guide: Setting Up Your eSIM Australia in 5 Minutes
Setting up your connection is surprisingly simple. If you can scan a QR code, you can set up an eSIM. Here is the step-by-step breakdown for both iPhone and Android users.
Step 1: Check Compatibility
Before purchasing, ensure your phone is “Carrier Unlocked” and supports eSIM technology. Most phones made after 2019 are ready to go. You can check by dialing *#06# on your keypad; if you see an “EID” number, your phone supports eSIM.
Step 2: Purchase Your Plan
Head over to Terminal eSIM and select the Australia plan that fits your trip. Once you check out, you will receive an email containing your unique QR code and activation instructions within seconds.
Step 3: Installation (The 5-Minute Process)
For iPhone Users:
- Go to Settings > Cellular (or Mobile Data).
- Tap Add eSIM or Add Cellular Plan.
- Select Use QR Code and scan the code provided in your Terminal eSIM email.
- Follow the prompts to label your new plan (e.g., “Australia Data”).
- Set your “Primary” line for Calls/SMS and your “Terminal eSIM” for Cellular Data.
For Android Users:
- Go to Settings > Network & Internet.
- Tap the + or SIMs button.
- Select Download a SIM instead? or Add eSIM.
- Scan the QR code from your email.
- Once downloaded, ensure the “Use SIM” toggle is turned ON.
Step 4: Final Activation
The most important step: Turn on Data Roaming for your new eSIM line. Don’t worry—you won’t be charged roaming fees by your home carrier as long as your home SIM’s roaming is turned off. Turning on roaming for the eSIM allows it to connect to the local Australian partner towers.
Comparison: Terminal eSIM vs. Other Options
Choosing the right provider is key to a frustration-free trip. Here is how different options for an eSIM Australia compare in terms of value and convenience.
| Feature | Terminal eSIM | Local Physical SIM | International Roaming |
| Setup Time | < 5 Minutes | 30–60 Minutes | Instant |
| Cost | Budget-friendly | Cheap | Very Expensive |
| Convenience | Digital / Remote | Requires Physical Store | Automatic |
| Keep Home No. | Yes (Dual SIM) | No (Must swap) | Yes |
| Verification | No ID Required | Passport Required | None |
Summary of Insights
While international roaming is the “easiest” option, it is often the most expensive, with some carriers charging up to $10 per day. Local physical SIMs are cheap but require you to waste precious vacation time in a shop and provide identity verification.
Terminal eSIM offers the “sweet spot”—the low cost of a local plan with the instant convenience of digital activation. It is the ideal choice for those who value their time and want to avoid hidden fees.
Trends and Troubleshooting for Your Australia eSIM
The travel tech landscape is shifting toward “Traveler-First” connectivity. One major trend in 2026 is the rise of unlimited data plans and 5G-ready eSIMs. As Australia phases out older 3G networks, having a provider that supports 4G/LTE and 5G is essential for reliable navigation in cities like Brisbane or Perth.
Common Problems & Solutions
- “No Service” After Installation: This usually happens if Data Roaming is toggled off. Ensure the eSIM is active and roaming is enabled in your settings.
- The QR Code Won’t Scan: Ensure you have a stable Wi-Fi connection during the setup. If the scan fails, you can always enter the “SM-DP+ Address” and “Activation Code” manually (found in your confirmation email).
- Slow Data Speeds: If you find your speeds are lagging, try restarting your phone. This forces the device to reconnect to the strongest local tower.
Frequently Asked Questions (FAQs)
Q: Can I use WhatsApp with my Australia eSIM?
A: Yes! Your WhatsApp is tied to your phone number, not your SIM card. You can continue using your existing WhatsApp account while your phone uses the eSIM for data.
Q: When should I install my eSIM?
A: We recommend installing it a day before you fly or while waiting at the airport. The “validity period” usually doesn’t start until you actually connect to a network in Australia.
Q: Can I share my data via Hotspot?
A: Most Terminal eSIM plans allow for personal hotspots, making it easy to share your connection with a laptop or a travel partner.
Summary of Key Takeaways
Staying connected in Australia doesn’t have to be a headache. By choosing an eSIM Australia plan, you bypass the old-school frustrations of physical SIM cards and the high costs of traditional roaming.
To recap, here is the 5-minute blueprint:
- Check your phone’s compatibility.
- Purchase your plan at Terminal eSIM.
- Scan the QR code in your settings.
- Label your plan and enable Data Roaming.
- Enjoy instant 4G/5G connectivity the moment you land.
Whether you’re a digital nomad needing reliable speeds for Zoom calls or a tourist just looking to find the best brunch spot in Melbourne, an eSIM provides the flexibility you need.
Get Ready for Your Adventure with Terminal eSIM
Don’t leave your connectivity to chance. Public Wi-Fi in airports can be spotty and insecure, and the last thing you want is to be stranded without a way to call a ride or check your hotel’s address.
At Terminal eSIM, we specialize in providing seamless, high-speed data for global travelers. Our Australian plans are designed to be affordable, reliable, and—most importantly—easy to use. With 24/7 support and a range of data packages tailored to your specific needs, we ensure that your only worry in Australia is whether you’ve packed enough sunscreen.
Ready to stay connected? Browse our eSIM Australia plans today and get your travel data sorted in under five minutes.