
A virtual SIM, or eSIM, can be a game-changer for staying online abroad without hefty roaming fees or the hassle of physical SIM cards. However, a few common slip-ups can turn this brilliant tech into a travel hiccup.
This guide is here to help you sidestep those pitfalls. We’ll walk you through the five most common virtual SIM mistakes travelers make and show you how to avoid them. From checking your phone’s compatibility to picking the right data plan, you’ll learn everything you need to know to make your next trip seamless. Let’s ensure your focus stays on exploring new destinations, not troubleshooting your data connection.
What is a Virtual SIM and Why Should You Care?
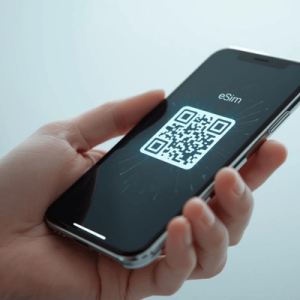
Before we dive into the mistakes, let’s get clear on what a virtual SIM actually is. Unlike the traditional plastic SIM cards you have to physically insert into your phone, a virtual SIM (eSIM) is a digital SIM that is embedded directly into your device’s hardware. You can’t see it or touch it, but it does the same job: it connects your phone to a cellular network.
The concept isn’t entirely new. The technology has been developing for years, but its adoption in consumer devices like smartphones and smartwatches has exploded recently. Initially, eSIMs were aimed at the Internet of Things (IoT) industry to help manage connectivity for millions of devices remotely. Now, this powerful technology is in the hands of everyday travelers.
So, why the excitement? The benefits are significant. With a virtual SIM, you can download and activate a cellular plan from a provider like Terminal eSIM directly from your phone. This means no more hunting for a local SIM card store after a long flight or fumbling with tiny SIM trays and ejector tools. You can buy a data plan for your destination before you even leave home and activate it the moment you land. For example, if you’re flying from New York to Japan, you can purchase a Japanese data plan online, install the eSIM profile on your phone, and be connected to a local network as soon as you touch down in Tokyo. This eliminates the stress of relying on spotty airport Wi-Fi to message your family or book a ride.
5 Common Virtual SIM Mistakes and How to Fix Them
Using a virtual SIM is incredibly simple, but a little prep work goes a long way. Avoiding these five common errors will guarantee a smooth and stress-free connectivity experience on your travels.
1. Not Checking Your Phone’s Compatibility
This is the most fundamental mistake you can make. Not all phones are eSIM-compatible. Many travelers purchase a virtual SIM plan only to discover their device doesn’t support it. Most newer flagship models from major brands like Apple, Google, and Samsung include eSIM technology, but older or budget models might not.
How to Fix It: Before you purchase any plan, check your phone’s specifications.
- For iPhone: Go to Settings > Cellular (or Mobile Data). If you see an option to “Add eSIM” or “Add Cellular Plan,” your phone is compatible.
- For Android: The path can vary, but it’s typically under Settings > Network & Internet > SIMs. Look for an option to add a SIM via a QR code.
- You can also dial *#06# on your phone. If an “EID” number appears, your device has an eSIM. Always double-check with your device manufacturer’s website to be certain.
2. Buying the Wrong Data Plan
It’s easy to get tempted by a large data allowance or a low price, but the “best” plan is the one that fits your specific needs. Buying too little data can leave you stranded offline, while buying too much is a waste of money. Consider the length of your trip, your data habits (are you a light browser or a heavy video streamer?), and the number of countries you’re visiting.
How to Fix It: Assess your usage. Check your phone’s data usage from the previous month to get a baseline. If you’re going on a 10-day trip and normally use 15 GB a month, a 5-7 GB plan should be sufficient for maps, messaging, and social media. Providers like Terminal eSIM offer a wide range of plans tailored to different needs, from single-country plans for a weekend getaway to regional plans covering all of Europe.
3. Waiting Until You Arrive to Install It
While you should wait to activate your plan until you land, you should install it before you leave. The installation process requires a stable internet connection to download the eSIM profile. Trying to do this with unreliable airport Wi-Fi can be a recipe for disaster.
How to Fix It: Purchase and install your virtual SIM plan while you’re still at home with a reliable Wi-Fi connection. The process usually involves scanning a QR code sent to your email. Once installed, keep the eSIM line turned off until you reach your destination to prevent it from activating prematurely.
4. Deleting the eSIM After Your Trip
A virtual SIM isn’t a one-and-done product. Many people mistakenly delete the eSIM profile from their phone once their trip is over, thinking they need to free up space. However, this permanently removes the plan. If you have data left or plan to top it up for a future trip, deleting it means you lose it for good.
How to Fix It: Simply disable the eSIM line in your phone’s settings. This stops it from using data but keeps the profile ready for future use. You can easily top up many eSIMs or purchase a new plan for the same profile later, saving you the installation step on your next adventure.
5. Ignoring Your Provider’s Activation Instructions
Every virtual SIM provider has slightly different steps for activation. A common error is failing to turn on “Data Roaming” for the eSIM line once you arrive. Users often assume this will lead to charges from their primary carrier, but for an eSIM, it’s necessary to connect to the local partner network.
How to Fix It: Read the instructions from your provider carefully. They will specify exactly what settings need to be enabled. For most travel eSIMs, you must enable Data Roaming on the eSIM line to get service. Your home provider will not charge you as long as data is switched off for your primary SIM.
Comparing Connectivity Options: Virtual SIM vs. Others
To understand the value of a virtual SIM, it helps to see how it stacks up against other common travel connectivity options. Each method has its pros and cons depending on your needs, budget, and destination.
| Feature | Virtual SIM (e.g., Terminal eSIM) | Local Physical SIM | International Roaming |
| Convenience | High: Purchase and install from anywhere before your trip. Instant activation upon arrival. | Medium: Must find a local store, deal with language barriers, and swap physical cards. | Very High: Works automatically without any setup. |
| Cost | Low to Medium: Very competitive pricing, often cheaper than roaming. Pay only for what you need. | Low: Generally the cheapest option for data, especially for long stays. | Very High: Can be extremely expensive, with high per-MB rates and unexpected charges. |
| Flexibility | High: Easily switch between plans and providers. Keep your primary number for calls/texts. | Low: Tied to one carrier in one country. Getting a new SIM for another country is a hassle. | Medium: Usually covers many countries, but plans are rigid and costly. |
| Setup | Easy: Scan a QR code. No physical parts to handle or potentially lose. | Moderate: Requires opening SIM tray, swapping cards, and sometimes registration. | None: No setup required; it’s enabled by default with your home carrier. |
| Best For | Short-to-medium term travelers, digital nomads, and multi-country trips. | Long-term stays in a single country or budget-conscious travelers. | Short business trips or users who prioritize convenience over cost. |
In summary, while international roaming offers maximum convenience, it comes at a steep price. Local SIMs are budget-friendly but require time and effort to acquire. A virtual SIM strikes the perfect balance, offering the convenience of a digital setup with the affordability of local-like rates. This makes it an ideal solution for the modern traveler who values both time and money.
Common Traveler Concerns and FAQs
Even with all its benefits, some travelers hesitate to make the switch to a virtual SIM. Let’s address some common questions and concerns.
A major worry for travelers is the reliability of service. Will the connection be fast enough? Will it work in remote areas? Reputable virtual SIM providers like Terminal eSIM partner with top-tier local networks in each country. This means you get the same high-quality, high-speed coverage that locals enjoy. You aren’t relegated to a slower, secondary network.
Another concern is security. Is it safe to download a cellular plan from the internet? Absolutely. The eSIM technology itself is built on secure standards. The QR code you receive is unique to your purchase and securely provisions the plan to your specific device. It’s far more secure than using public Wi-Fi networks at cafes or airports, which can expose your data to potential threats.
Here are a few frequently asked questions:
- Can I still receive calls and texts on my primary number?
Yes. Most modern smartphones are Dual SIM, Dual Standby (DSDS). This means you can keep your primary line active for calls and texts while using the virtual SIM for mobile data. You can configure your phone to use the eSIM for all data traffic, saving you from any roaming charges from your home carrier. - What happens if I use up all my data?
This depends on your provider. With Terminal eSIM, you can easily top up your plan directly through the website. You can purchase another data package for your destination without needing to install a new eSIM. This flexibility ensures you’re never left without a connection when you need it most. - Do I need to unlock my phone to use a virtual SIM?
Yes, your phone must be “carrier-unlocked” to use an eSIM from a different provider. A locked phone is restricted to the carrier you bought it from. You can contact your home carrier to request they unlock your device; they are often required to do so if your contract is paid off.
A Quick Recap for a Smarter Trip
Using a virtual SIM is one of the smartest moves you can make before an international trip. It offers a blend of convenience, affordability, and flexibility that older connectivity methods can’t match. By avoiding a few common mistakes, you can ensure your experience is seamless from start to finish.
Remember the key takeaways: always confirm your phone’s eSIM compatibility before you buy. Choose a data plan that truly matches the length of your trip and your usage habits—don’t just grab the biggest or cheapest option. Be sure to install your virtual SIM profile while you have a stable internet connection at home, but wait to activate it until you arrive at your destination. Finally, resist the urge to delete the eSIM profile after your trip is over; simply disable it so it’s ready for your next adventure. By following these simple guidelines, you can harness the full power of eSIM technology.
Stay Connected Effortlessly with Terminal eSIM
Your travels deserve to be simple. Say goodbye to the fear of bill shock from roaming and the hassle of hunting for physical SIM cards in a new country. A virtual SIM empowers you to connect like a local, with the ease of a global traveler. Whether you’re a digital nomad hopping between cities, a family on a two-week vacation, or a frequent flyer on a business trip, the right connectivity solution is crucial.
Terminal eSIM provides reliable, high-speed data plans for over 190 destinations worldwide. Our plans are designed for travelers, offering everything from a few gigabytes for a weekend trip to larger packages for extended stays. You can get connected in minutes, all from the comfort of your home.
Ready to travel smarter? Explore our affordable and flexible virtual SIM plans today and make connectivity the easiest part of your next journey.