Enter the eSIM—the tiny, embedded chip inside your smartphone that allows you to download a data plan instantly, anywhere in the world.
Whether you are navigating the bustling streets of Tokyo, hiking the Swiss Alps, or attending a business conference in New York, having a reliable internet connection is no longer a luxury; it’s a necessity. Terminal eSIM provides a seamless way to bridge that gap, offering global connectivity without the headache of physical SIM cards.
However, if you’ve never used this technology before, the setup might seem a bit daunting. In this comprehensive guide, we will walk you through everything you need to know about activating an eSIM on both iPhone and Android devices, ensuring you land with data ready to go.
What is an eSIM and Why is it Better for Travelers?
Before we dive into the technical “how-to,” let’s clear up exactly what an eSIM is. The “e” stands for “embedded.” Unlike the traditional physical SIM card that you slide into a slot, an eSIM is a small chip built directly into your phone’s motherboard.
A Brief History of Connectivity
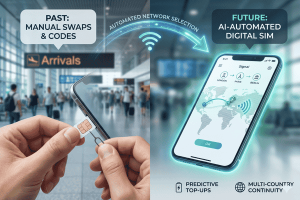
For decades, we relied on the physical Subscriber Identity Module (SIM). As phones got smaller, SIMs shrunk from “Standard” to “Micro” and finally to “Nano.” In 2018, Apple introduced the first iPhones with eSIM support, and by 2026, many flagship smartphones have ditched the physical SIM tray entirely.
Why Travelers are Making the Switch
The shift to digital SIMs isn’t just about saving space inside the phone; it’s about freedom. Here are a few reasons why travelers prefer this technology:
- Instant Activation: You can purchase and install a plan while sitting in your living room. No need to wait for a card in the mail or find a store at the airport.
- Keep Your Number: You can keep your primary physical SIM active for receiving important SMS (like bank OTPs) while using your eSIM for affordable travel data.
- Security: If your phone is stolen, a thief cannot simply “remove the SIM” to prevent it from being tracked. The digital profile is locked to your device.
- Environmentally Friendly: By eliminating plastic cards and packaging, we reduce the carbon footprint of global telecommunications.
For many digital nomads and frequent flyers, the ability to store multiple eSIM profiles on one device is a game-changer. You could have a profile for Europe, one for Asia, and your home plan, all toggled on or off with a few taps.

Practical Guide: How to Activate Your eSIM on iPhone & Android
Ready to get connected? The process is remarkably similar across both major platforms, but the menu names differ slightly. Before you begin, ensure your device is carrier-unlocked and connected to a stable Wi-Fi network.
1. Activating an eSIM on iPhone (iOS)
Apple has streamlined the process significantly in recent years. Most users will use the QR code method provided by Terminal eSIM.
- Open Settings: Tap on the “Settings” app on your iPhone.
- Select Cellular: Tap on Cellular (or Mobile Service).
- Add eSIM: Tap on the blue Add eSIM button.
- Use QR Code: Select Use QR Code. This will open your camera.
- Scan the Code: Point your camera at the QR code provided in your Terminal eSIM confirmation email.
- Follow Prompts: Tap Continue when the “Activate eSIM” screen appears.
- Label Your Line: Choose a label for your new plan (e.g., “Travel” or “Terminal Data”).
- Set Default Line: Select which line you want to use for data. For travel, set your new eSIM as the “Cellular Data” line.
📺 Watch the Video Tutorial: How to Install & Activate eSIM on iPhone
2. Activating an eSIM on Android (Samsung, Pixel, etc.)
Android menus can vary slightly by manufacturer, but the general path is consistent.
For Samsung Galaxy Users:
- Go to Settings > Connections.
- Tap SIM manager.
- Tap Add eSIM.
- Select Scan QR code from service provider.
- Scan your code and tap Add.
For Google Pixel Users:
- Go to Settings > Network & Internet.
- Tap the + icon next to SIMs.
- Select Download a SIM instead?
- Scan your QR code and follow the on-screen instructions.
📺 Watch the Video Tutorial: How to Install & Activate eSIM on Android
Comparison: Travel Connectivity Options in 2026
Choosing the right way to stay connected depends on your budget and travel style. Here is how eSIM technology stacks up against traditional methods.
| Feature | Terminal eSIM | Local Physical SIM | International Roaming |
| Setup Time | < 5 Minutes | 30–60 Minutes | Instant |
| Cost | Low / Local Rates | Very Low | Extremely High |
| Convenience | Digital / Remote | Physical Store Visit | Automatic |
| Keep Home No. | Yes (Dual SIM) | No (Must Swap) | Yes |
| Ease of Use | Simple App/QR | Manual Swap | Plug & Play |
Key Insights from the Table
While International Roaming is the easiest, it is often the most expensive, leading to “bill shock” after your trip. Local SIMs offer great prices but require you to find a physical store and potentially lose your home SIM card in the process. An eSIM via Terminal eSIM offers the perfect middle ground: the local pricing of a physical SIM with the instant convenience of digital activation.
Trends, Troubleshooting, and FAQs
As we move deeper into 2026, we are seeing a “silent activation” trend where phones automatically detect travel plans based on GPS. However, technology isn’t always perfect. If you encounter issues, here are the solutions to the most common problems.
Common Troubleshooting Steps
- “No Service” after activation: Ensure that Data Roaming is turned ON for the specific eSIM line. Many users forget this step, but it is essential for travel plans to work on local partner networks.
- Activation is taking too long: If the screen says “Activating…” for more than 10 minutes, try toggling Airplane Mode on and off.
- QR Code won’t scan: Check your screen brightness. If you are scanning from another phone or a laptop, turn the brightness up to 100%.
Frequently Asked Questions (FAQs)
- Can I use WhatsApp/iMessage with a travel eSIM?
Yes! Since most travel plans are data-only, your phone will continue to use your original phone number for WhatsApp and iMessage. Just ensure you select “Keep using my existing number” when prompted.
- Does my phone need to be unlocked?
Yes. If your phone is currently on a payment plan with a specific carrier, it might be “locked.” You must contact them to unlock the device before it will accept an eSIM from another provider.
- Will I lose my contacts if I switch to an eSIM?
Not at all. Your contacts are stored in your phone’s cloud (iCloud or Google Account), not on the SIM card itself.
Summary of the Activation Process
To recap, activating an eSIM is a straightforward three-step process: Buy, Scan, and Switch.
- Buy: Select a plan for your destination at Terminal eSIM.
- Scan: Use your phone’s settings to scan the QR code received via email (or watch the videos above for help).
- Switch: Once you land, toggle the line to “On” and ensure “Data Roaming” is enabled.
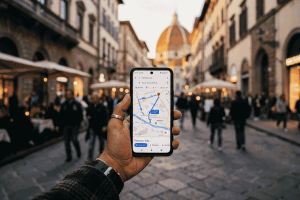
By following these steps, you eliminate the stress of finding Wi-Fi at a busy terminal or dealing with language barriers at a local mobile kiosk. You gain the freedom to call an Uber, check Google Maps, or post to social media the moment the plane wheels touch the tarmac.
Get Started with Terminal eSIM Today
The world is waiting, and staying connected should be the easiest part of your journey. Whether you are a digital nomad moving between co-working spaces or a family on a once-in-a-lifetime vacation, Terminal eSIM provides the reliability and speed you need.
With coverage in over 190 countries and 5G speeds in most major regions, we take the complexity out of travel tech. Don’t wait until you land to figure out your internet—set up your plan today and travel with confidence.
Ready to fly? Browse our affordable data packages and get your eSIM in seconds.